
How to Draw a Cute Penguin: A Simple Step-by-Step Guide for Kids
Are you looking for a fun and easy art project for your little ones? Whether you are a parent looking for a rainy-day activity or a teacher planning a winter-themed lesson, learning how to draw a penguin is a fantastic way to build fine motor skills and confidence!
Penguins are some of the most beloved animals in the world, and luckily, they are also very easy to sketch using basic shapes. Follow our simple guide below to create your very own chilly friend!
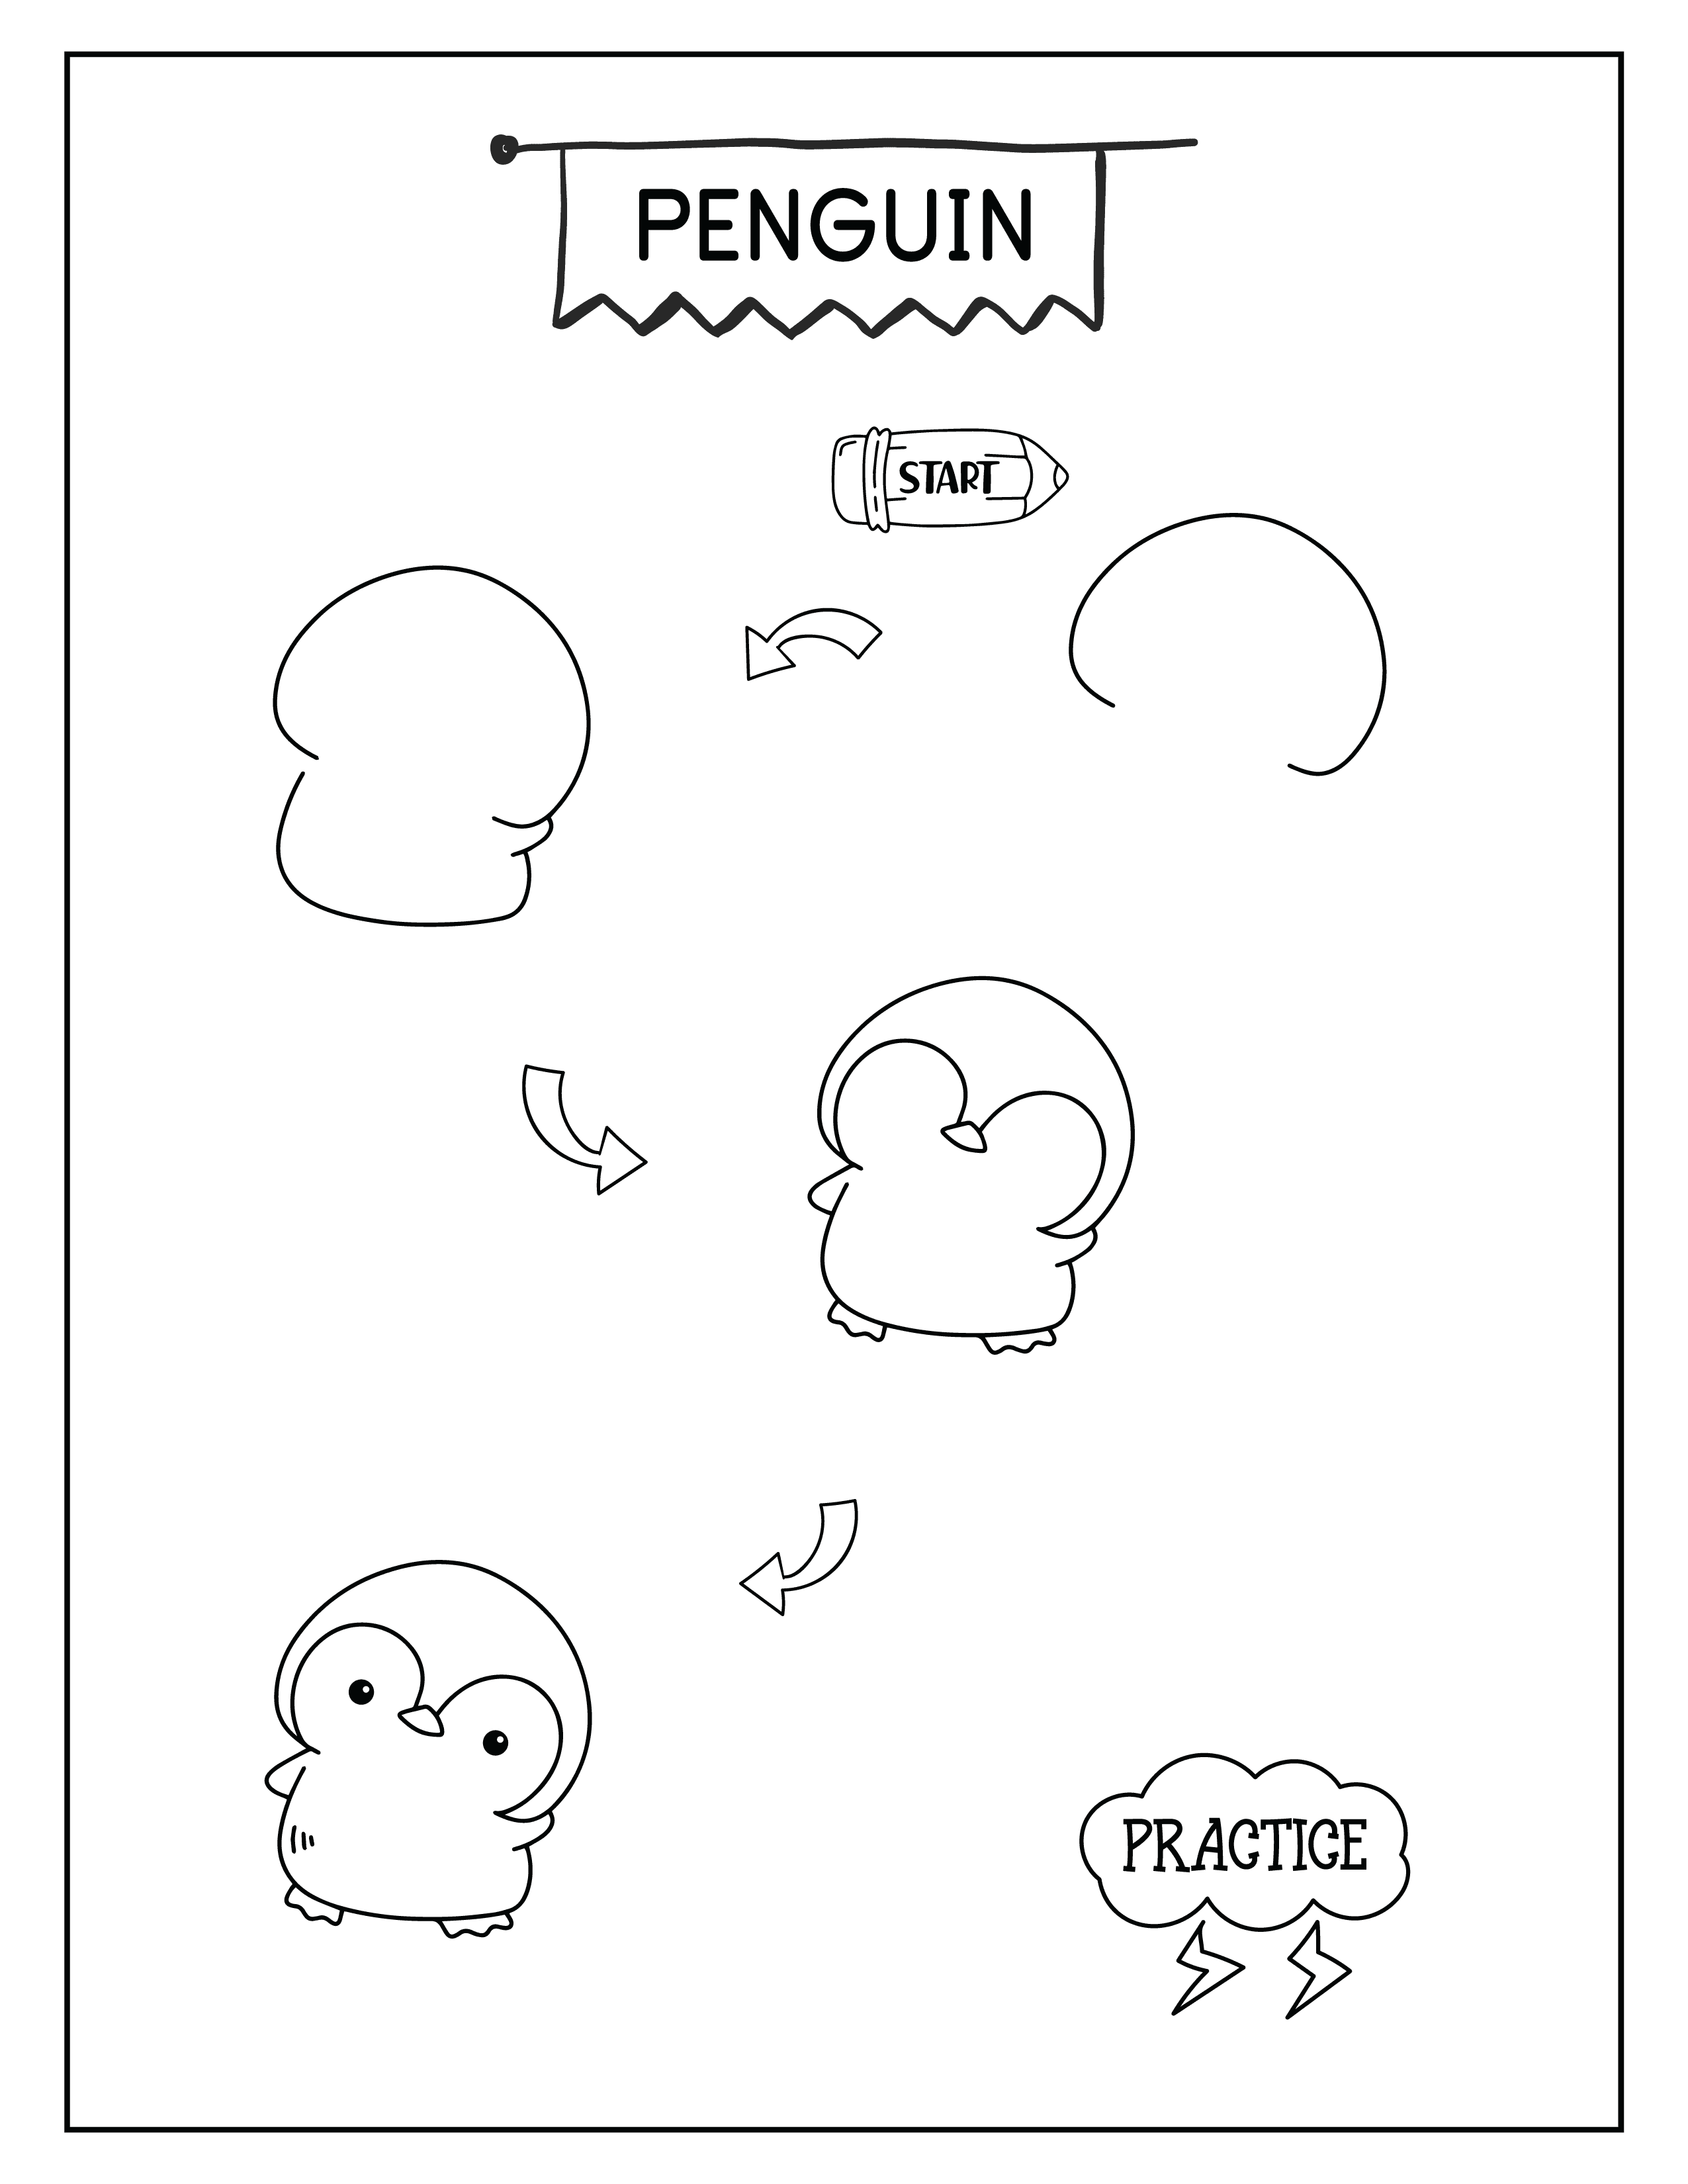
4 Easy Steps to Draw Your Penguin
Drawing doesn't have to be complicated. By breaking the penguin down into shapes, anyone can do it! Here is how to follow the tutorial above:
1. The "Open Oval" Head
Start at the "Start" pencil! Draw a large, curved line that looks like an upside-down "U" or an open oval. This will be the top of your penguin’s head.2. Build the Body
Next, connect the bottom of your head shape with a slightly wider, rounded base. This gives your penguin that cute, "squishy" look. Notice how the shape looks a bit like a pear or a bean!3. Add the Face and Flippers
Now it’s time for some personality!- The Face Mask: Draw two rounded arches inside the head to create the white part of the penguin's face.
- The Wings: Add two small curves on the sides for flippers.
- The Feet: Draw two tiny "wavy" shapes at the bottom for the feet.
4. The Finishing Touches
Finally, add two small black circles for the eyes and a tiny triangle for the beak. Don’t forget the little "blush" lines or texture marks on the side to make it extra adorable!Pro Art Tips for Kids
- Draw Lightly: Use a pencil first so you can erase any mistakes.
- Practice Makes Perfect: Look for the "Practice" cloud in our guide—that’s your reminder to try drawing it a few times!
- Add a Background: Once your penguin is done, why not draw some icebergs, a blue ocean, or a colorful scarf?


